Product quantity cannot be greater than 99
Sewing
-
Sew Newsworthy Sewing 101 Sewing Help Getting Started Tips & Hints
Troubleshooting Tips
Whether you are a more experienced sewist or you’re just getting started, here are a few tips we’d like to share with you to help keep your sewing easy and fun!
Wed, 03/14/2018 - 10:13
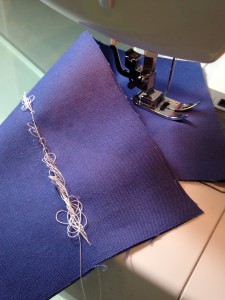
If Thread Loops Are Showing on the Underside of the Fabric
Thread looping on the underside of the fabric is always an indication that the upper thread is not correctly threaded. This happens when the upper thread is not correctly placed in the tension mechanism and has not been threaded through the take-up lever. To resolve this, rethread the machine, making sure to first raise the presser foot lifter and raise the needle to its highest position, so that the thread can be properly seated in the tension mechanism and take up lever.
If Bobbin Thread Is Showing on the Top of the Fabric
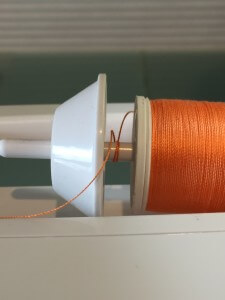
This can be caused if the top thread tension is too tight, or if the bobbin thread is not in the bobbin case tension. Check that the upper thread is feeding freely without obstruction (like getting stuck behind the spool cap or getting caught on any rough spots o the thread spool itself). Make sure the bobbin is correctly seated in the bobbin case (bobbin holder), and check that the upper thread tension is not set too tightly.
If Thread Is Shredding
Thread can shred when you sew if it is old or poor quality. Thread can also shred if the machine needle is worn out, or if the needle is the wrong style and size for the thread being used. The thread should pass freely through the eye of the needle in order to sew properly. Use threads that have a smooth, even filament.
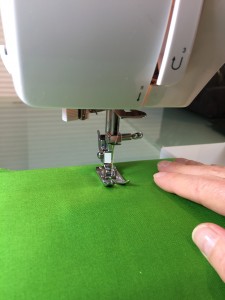
If Fabric Is Not Feeding Properly
If the machine is not feeding fabric when you start sewing, it could be that the presser foot lifter has not been lowered before stepping on the foot controller. Lower the presser foot and resume sewing.
Another reason the machine may not be feeding fabric is that the feed dogs (or feed teeth) are disengaged, so make sure that they are properly engaged for sewing. (Note: If your machine has drop feed, resume normal sewing by moving the drop feed lever to regular sewing mode, then turn the hand wheel toward you one full revolution to re-engage the feed dogs).
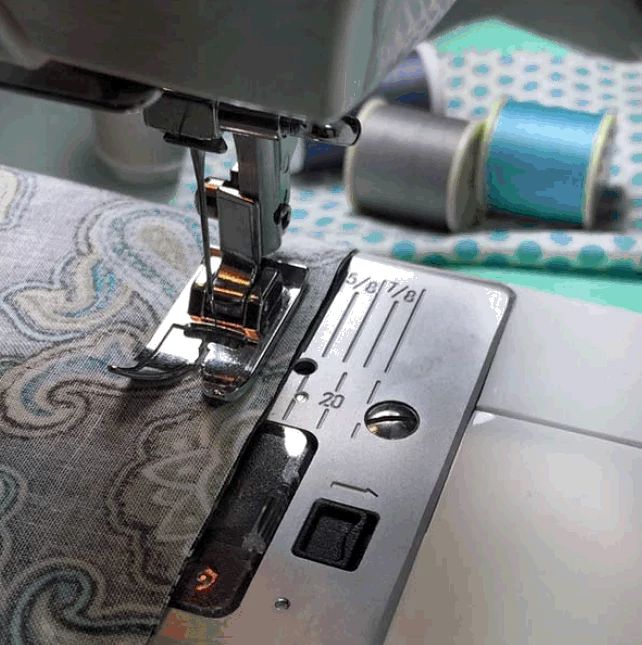
The machine may also not feed fabric if the stitch length control is set to “0”. Increase the stitch length setting and resume sewing.
If Needles Are Breaking
Needles can break if they are bent, dull or damaged. Discard the old needle and insert a new needle, appropriate for the thickness and type of fabric being sewn.
Needles can also break if you are “pushing” or “pulling” the fabric while sewing, as this causes the needle to deflect. The feed dogs (or feed teeth) are actually designed to do the work of drawing the fabric under the foot as you sew – you just need to guide the fabric!
If Upper Thread Is Breaking
If the upper thread is breaking, it could be that the thread path is obstructed, the machine is not correctly threaded or the upper thread tension is set to tightly. Be sure that the machine is correctly threaded and there are not obstructions (for example, thread getting caught behind the spool cap or a “rough spot” on the spool itself). Check also that the upper thread tension control is set correctly (consult your machine manual).
If Stitches Are Skipping
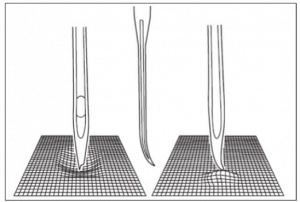
If your stitches are skipping on the fabric as you sew, this could be an indication that the needle was inserted incorrectly. Make sure that the needle goes all the way up into the needle clamp and that the flat side (at the top section of the needle) is facing toward the back.
Another reason stitches can be skipping is if the needle is the wrong style for the fabric. For instance, if you are sewing a stretch knit fabric using a regular point needle, you could be experiencing skipped stitches. Switching to a ball point needle will prevent stitches from skipping on stretch knit fabrics.
Worn out or damaged needles can also cause skipped stitches on a variety of fabric types. Discard the needle and insert a new one, appropriate for the fabric you will be sewing.
Check out our blog on needles to learn more.
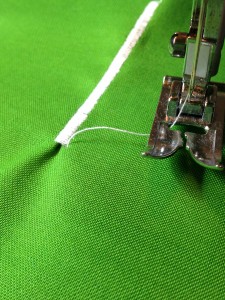
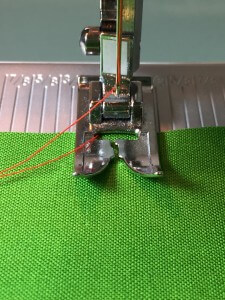
If Thread is Bunching at the Beginning of Sewing
Threads can get bunched up at the beginning of sewing if the top and bobbin threads have not been properly placed underneath the presser foot before starting to sew. Ensure that both threads are under the presser foot and placed toward the back of the machine before lowering the presser foot to start sewing.
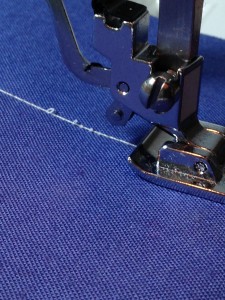
If Stitches Appear Distorted
Stitches can appear distorted on the fabric if you are “pushing” or “pulling” the fabric as you sew. Just let the feed dogs (or feed teeth) do the job of drawing the fabric along under the foot.
Another reason stitches could appear distorted is if the incorrect presser foot is used. For example, dense stitches usually require the use of either a Satin Foot or Open Toe Foot, so that the stitching can pass freely underneath. If the regular, All-Purpose Foot is used for dense stitching, stitches could get “stuck” under the foot. Just switch to a presser foot more appropriate for these types of stitches.
If Fabric Is “Tunneling” or “Puckering” under the Stitches
If fabric appears to be pulling together under the stitches, this is a good sign that you should use a fabric stabilizer underneath the fabric. Generally, use a tear-away stabilizer for woven fabrics and a cut-away stabilizer for stretch fabrics.